
 The Kalalau Trail stretches 11-miles along the Na Pali Coast on the island of Kauai. Known for its beauty and danger, the Kalalau Trail follows the rugged coastline on the north-west shore of the garden island of Hawaii, and eventually ends at the secluded Kalalau Beach. Hiking the Kalalau Trail is recommended for advanced hikers and after the first couple miles you will understand why. It leads through varying terrain with steep rock outcroppings, stream crossings that can swell unexpectedly, and traverses along crumbling cliff sides with falling rock hazards. Though it’s a difficult trail to hike, and in some sections, almost extreme, hiking the Kalalau Trail reveals breath taking views of the Na Pali Coast and is well worth the effort.
Hiking the Kalalau Trail
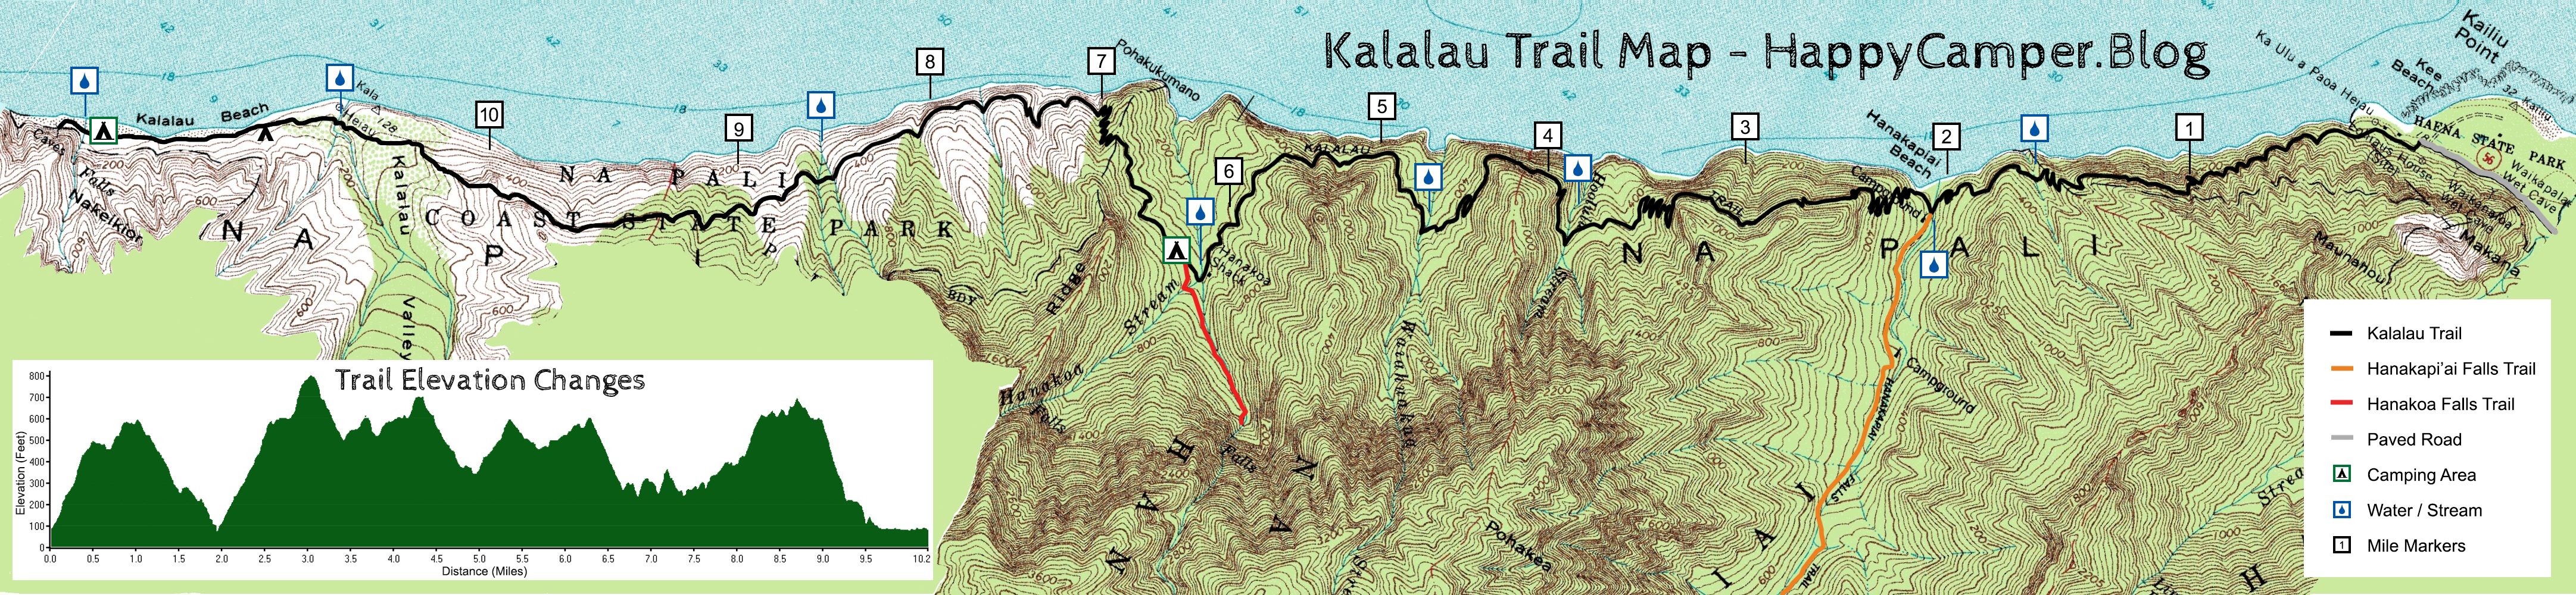
Click on Map for Large View
In February of 2017, we hiked the Kalalau Trail and spent two nights camping at Kalalau Beach. The weather during our hike was pretty mild, with temperatures in the 70’s and 80’s F , lending to nice, breezy sections of the trail.
 Hiking the Kalalau Trail took us about nine hours to hike straight to Kalalau Beach and about ten hours to hike back, with a detour to the Hanakoa Waterfall. Some people prefer to break up the hike into two days and camp at Hanakoa, which is the half-way point along the trail. If you start early in the morning like we did, and have experience hiking technical terrain, you can certainly make the entire hike in one day. But remember, hiking the Kalalau is no walk in the park; as conditioned hikers, we still found sections of the trail to be grueling, testing our stamina. The last mile on our way out, was the most difficult section for the both of us.
There are ten mile-markers along the trail, but some can be difficult to locate. The Kalalau Trail starts at the Ke’e State Park Beach parking lot. Hikers can leave parked vehicles in this parking lot but it’s known to fill-up quickly so arrive early to find parking. You can also find bathrooms and outside showers available at Ke’e Beach.
Miles 0 – 2
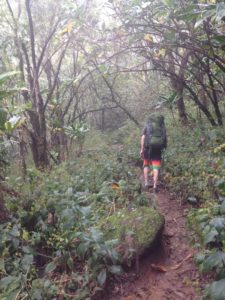
 The Kalalau Trail starts with a gradual climb up the Na Pali Coast for the first mile, then descends down for another mile to the Hanakapai’ai Beach area. This is where one of the three larger stream crossings is located and depending on conditions, can be tricky. We packed water shoes just for the stream crossings but noticed most hikers slowly hopped around on the rocks using hiking poles and eventually made it across dry. Once you’ve crossed the stream, there’s a day-use beach area with a few composting toilets. The trail splits here with good, obvious signage. This is where the Hanakapai’ai Valley trail starts, stretching four miles into the valley to Hanakapai’ai Falls. While we didn’t have the time to spare to hike into Hanakapai’ai, it would make a fantastic detour for those camping at Hanakoa. For all other hikers heading to Kalalau, follow the Kalalau Trail signs towards Hanakoa and Kalalau Beach, and continue up the hill. Permits are required to continue past this point of the Kalalau Trail and it also starts to becomes more overgrown and less maintained from here. Be prepared to walk through brush, as the trail can get as narrow as a single track.
Miles 2 – 6
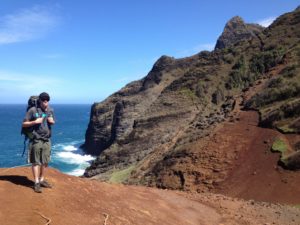
 At mile 2, the trail leaves the beach and heads up a strenuous climb for about the next mile. Once you’ve ascended all the way up the climb, you reach an old gate section along the trail that you hike through. Immediately after the gate there is a rock out cropping with amazing views of the coast. This is a great area to take a break and enjoy the view, especially after the last climb. Miles 3 and 4 ascend into a couple smaller valleys and eventually hike to the Hanakoa camp. This is the half-way spot available for hikers with composting toilets and several covered camping spots. This is also where the second larger stream crossing is located.
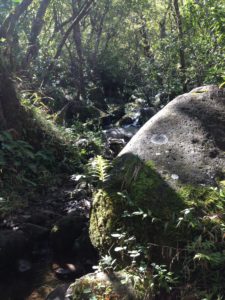
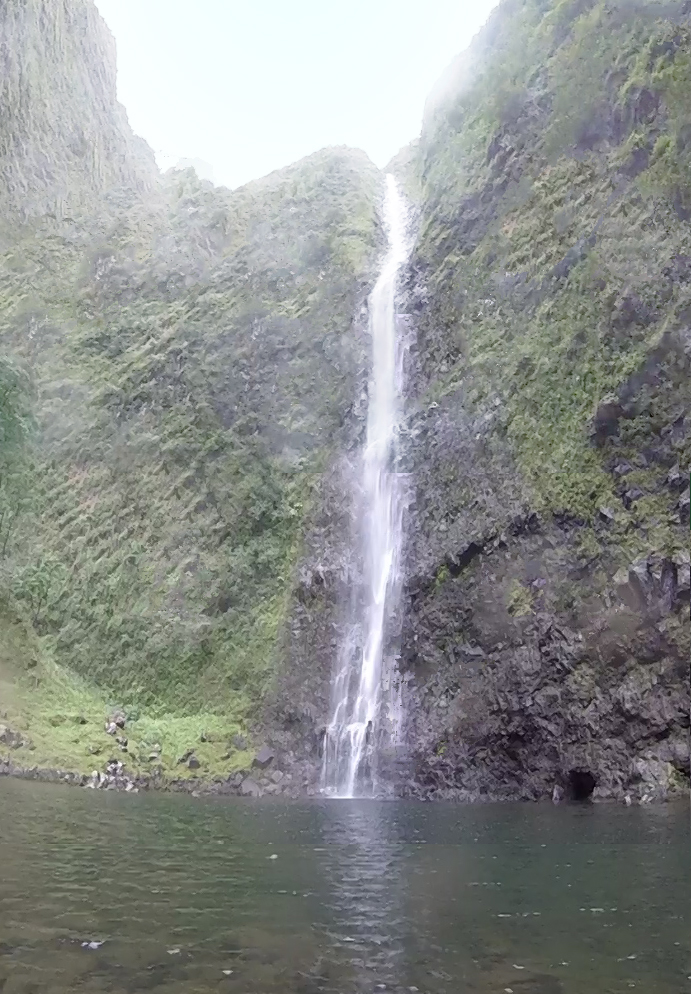 The trail also splits here with the trail head to Hanakoa Falls. This waterfall is about a half-mile hike up the valley on a very overgrown difficult trail. It’s not very well marked but look to follow the orange streamers tied in the trees. The hike is slow moving but well worth the detour. The Hanakoa Falls is a gigantic waterfall that crashes into a large secluded fresh water pond.
We also spotted a few camp sites along this trail, closer to the main Kalalau trail. These wer more secluded and off the beaten path and we may have considered camping a third night, if we had known about these little gems. Don’t get discouraged by the covered camping areas right on the trail- there are other sites if you look for them.
Miles 6 – 8
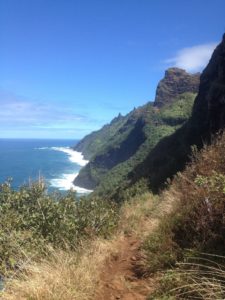
 To continue along the Kalalau trail from Hanakoa camp, follow the signage towards Kalalau beach. For the next mile you’ll climb out of the Hanakoa valley. Shortly after mile 7 you start hiking into more exposed cliff traverses and finally cross a narrow section known as “Crawlers Ledge”. This is the most noted and feared section of the trail. It spans about 1 mile with a small, shallow, single lane path, carved into the steep cliffside about 200 feet above the ocean pounding below. At the most narrow section, only one person can pass at a time. The path can also become loose and crumbly. Use extreme caution when hiking this section of the trail. Go slow, keep your balance, and watch your footing.
Mile 8 – 11
 As you continue to hike up and away from the coast you pass mile 8 and start getting into a section of exposed, red clay known as “Red Hill”. You climb up the steep hillside for about a mile and then around mile 9 you hike down an even steeper section to the coast. At mile 10 you’ve arrived in the Kalalau Valley where you start seeing some of the ancient terraces. You also cross the last of the larger stream crossings, here. This is a great place to fill-up on water, as it is the closest stream to the camp area but still a half mile away. Once you’ve crossed the stream, the trail splits with the trail-head for the Kalalau Valley. Follow the signs towards Kalalau Beach and continue along the flat, coastline trail to the final destination.
Kalalau Trail Permits
Permits are required to hike past Hanakapiʻai Valley and to camp at Hanakoa and Kalalau Beach. Permits must be reserved in advance through the State of Hawaii website and costs $20 a day, per person. Locals get a $5 discount with state ID. Only 60 permits per day are issued and it’s best to reserve permits about a year in advance before your hike. Permits can get reserved quickly but we only requested ours about 6 months before. We were able to get our permits with no problems and had them emailed with confirmation a couple days later.
Drinking water on Kalalau Trail
 You must stay hydrated, especially when hiking a strenuous trail like this with warm temperatures, exposed sections with intense sun, and humidity. So it’s great that the Kalalau trail has so many resources to filter water from. On our trip, there were around 8 different locations along the trail, including 3 larger stream crossings to get water. At the most, we hiked two miles between water sources. We packed a 64 oz and a 40 oz canteen during our hike and stopped to refill a couple times along the trail. All water along the Kalalau Trail must be treated so it’s safe to drink. The cool thing about this trial is that it never stays the same. We had some rain fall the night before we hiked out, and found that the small, trickling streams two days before, had turned into small gushing waterfalls. Just a friendly reminder that the island is a living organism in itself.
Camping Along Kalalau Trail
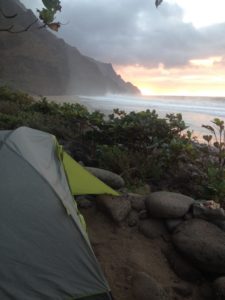 There are two designated camping areas along the Kalalau Trail. While we didn’t camp at Hanakoa, we did camp two nights at Kalalau Beach. Camping along the Kalalau Beach was amazing but camping at Hanakoa would also be very exciting, with the Hanakoa waterfalll so close. Follow the link to read more about Camping on Kalalau Beach.
Hazards On Kalalau Trail
 Like any great camping tip, there were hazards to look out for when hiking the Kalalau Trail, especially when it’s raining. Heavy rains can even close the trail from time-to-time for a couple hours or even a couple days. You should always have a good idea about the weather forecast (even if it does change by the minute in Kauai) before hiking the trail and plan ahead. During rainy conditions you should be aware of the following hazards:
Stream crossing are prone to flash flooding. This can make the water levels rise very quickly and can have much stronger currents.
 Slippery exposed rocks, including crawlers ledge, can become slick and un-passable. Even the mud along the trail can become slippery, heavy, and sticky, making the hike seem nearly impossible in some areas.
We did get a storm the night before we left that brought rain all night. The most difficult challenges this brought to the trail for us was the hike back up Red Hill between miles 9 – 10. The red clay dirt became so heavy and slippery, and it stuck light cement to your shoes. Hiking poles were a life saver for these conditions. Crawlers ledge was also a little wet and slick when we hiked that section but we pounded the mud off our shoes and used caution and we made the crossing. And while the streams did rise, they hadn’t reached levels too dangerous to cross, thankfully.
Camping Gear Recommendation
One piece of gear that proved to be crucial for us on the Kalalau Trail was our Black Diamond Trail Trekking Poles. These came especially handy during big rock climbs, steep hill traverses, muddy and slippery sections of trail, and provided extra balance when scaling the rock ledge. We split a pair, hiking with one pole each.
Camping Post Comments